


-
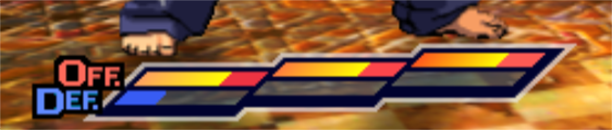

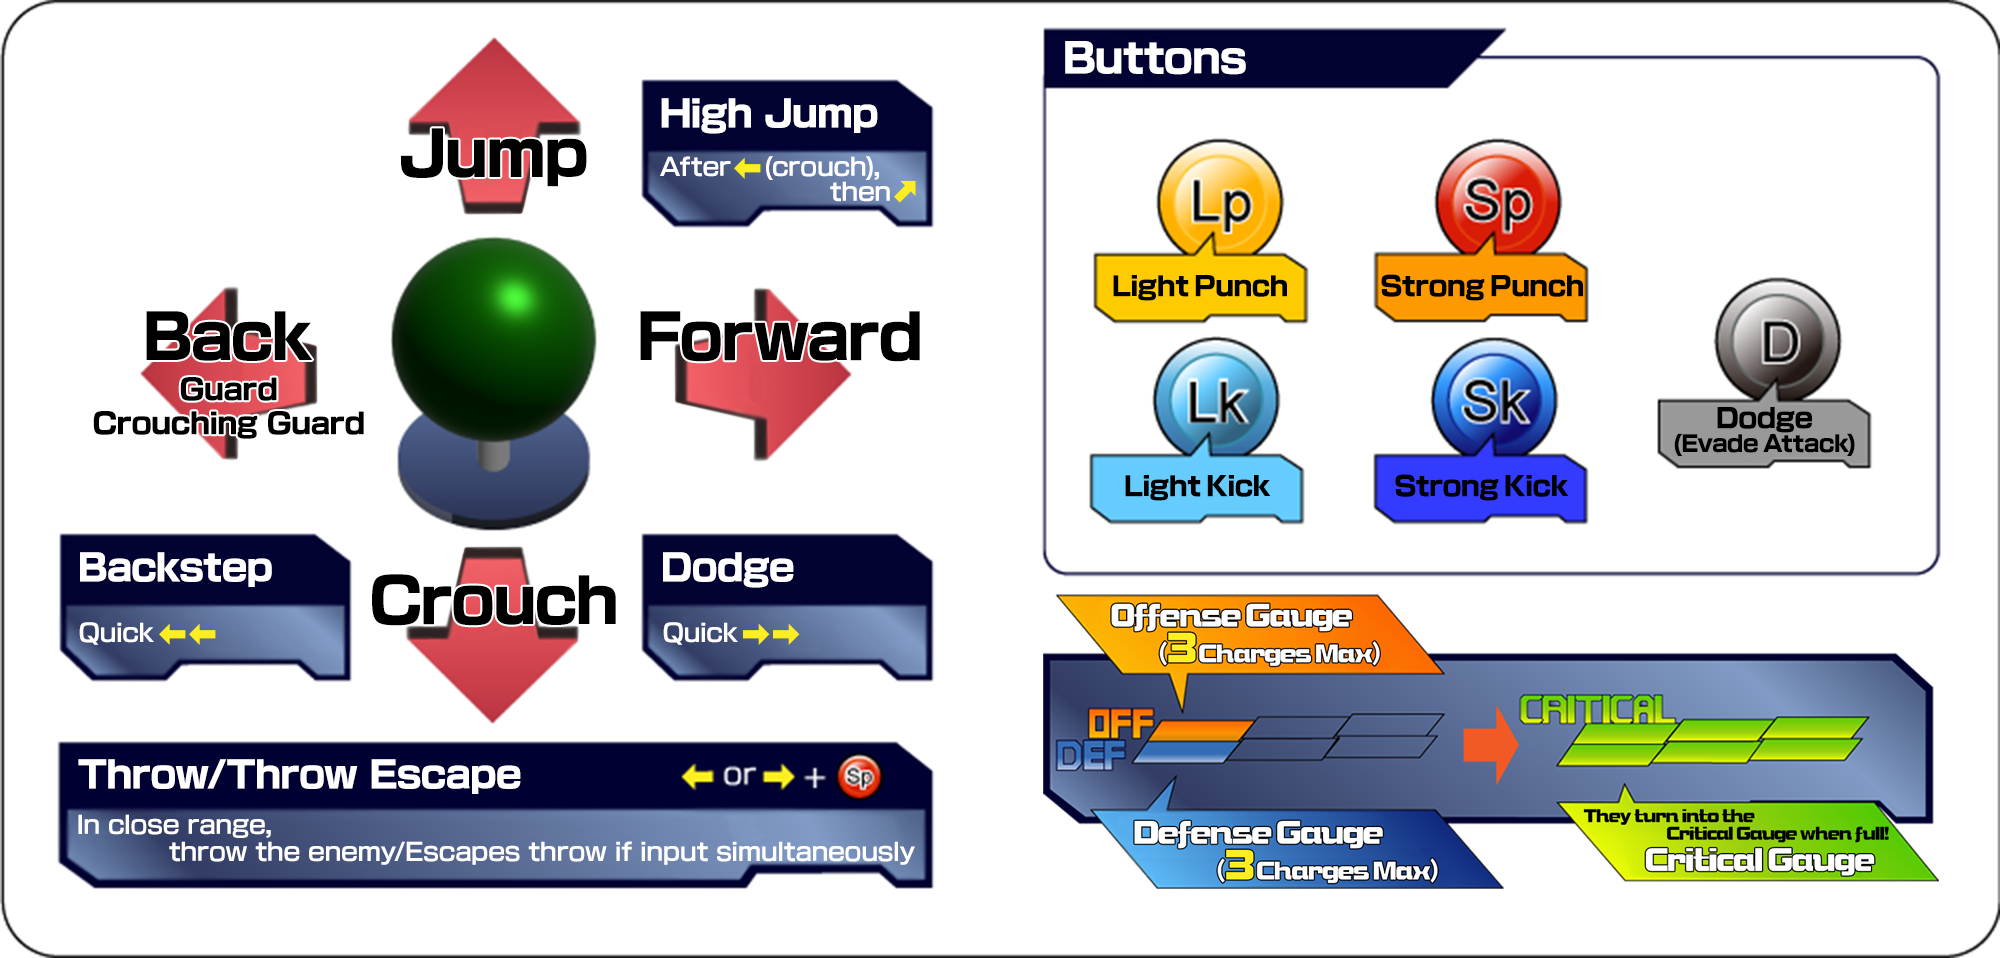
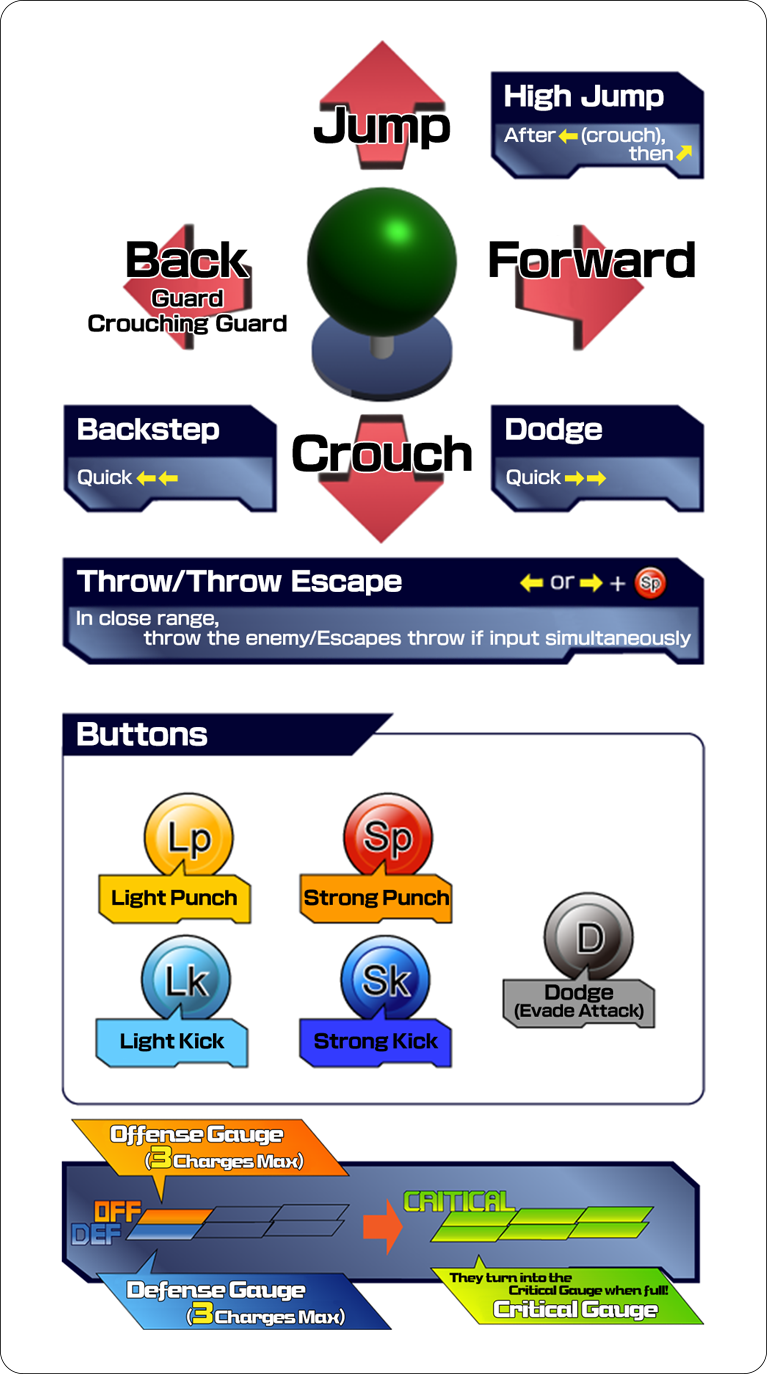
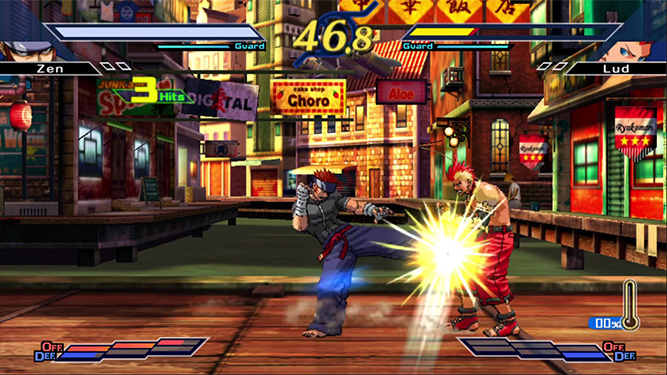
The upper red gauge found at the bottom of the screen.
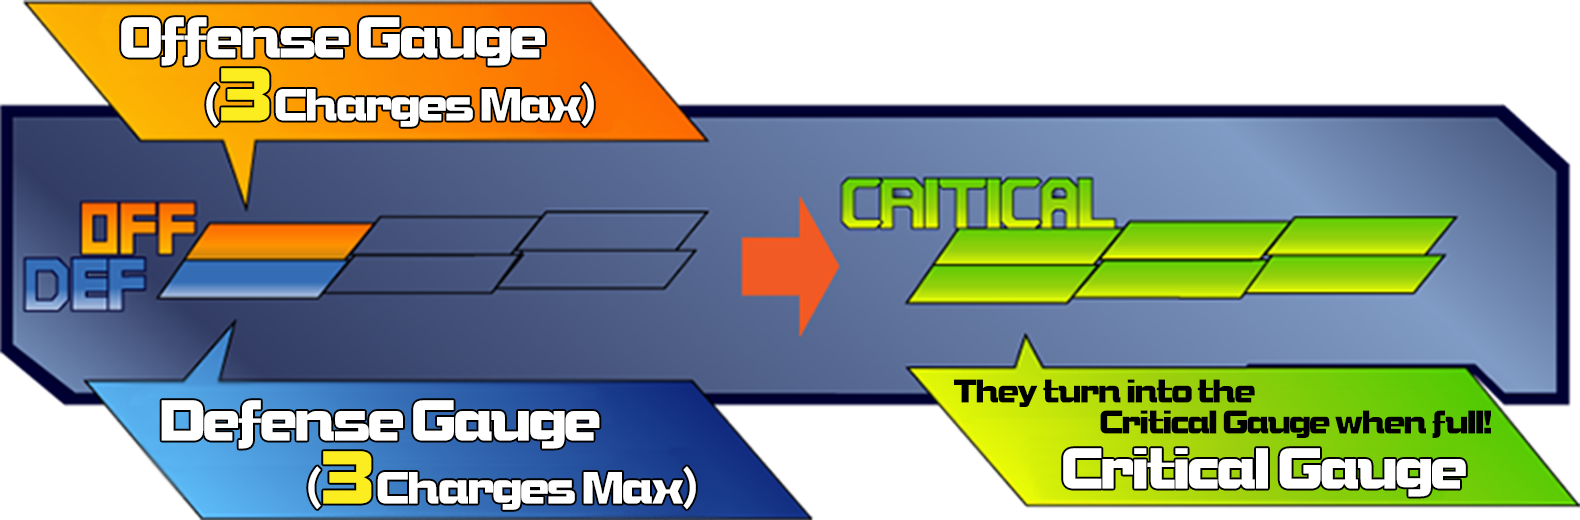
It builds when your attacks hit or are blocked by the opponent.
It can be charged to up to three levels.
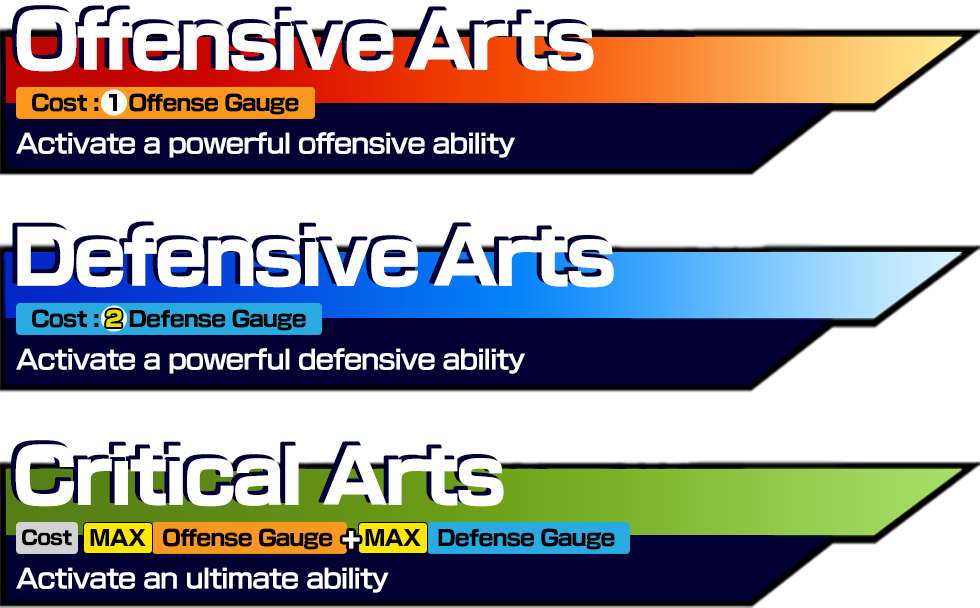
Use it to unleash offensive moves such as Offensive Arts, Advance Attacks, and Jolt Attacks. See respective sections for more details. -
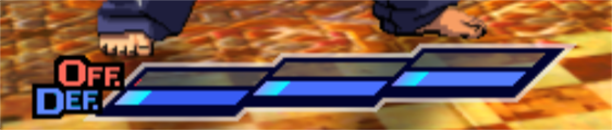

The lower blue gauge found at the bottom of the screen.
It builds from blocking the opponent's attacks.
It also builds automatically but slowly over time.
It can be charged to up to three levels.
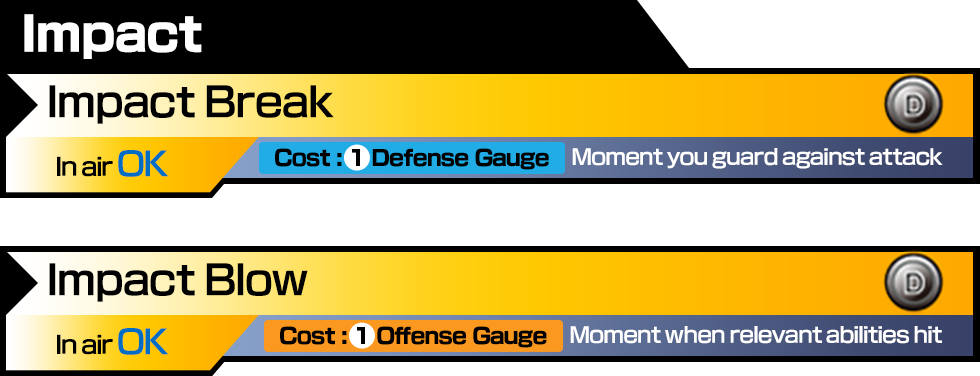
Use it to activate defensive moves such as Defensive Arts, Quick Recovery, and Impact Breaks. See respective sections for more details. -
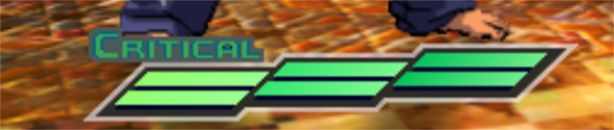

When both gauges are filled to the max, they become a green Critical Gauge.

They key to mastering TRF lies in how you use both the offense and defense gauges!
-
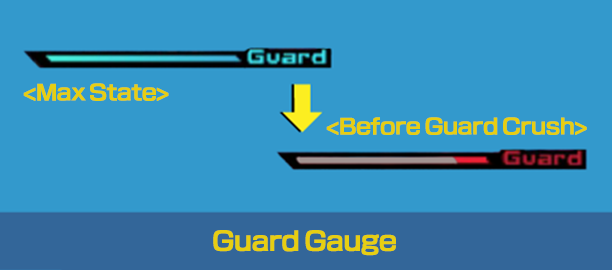

The small blue gauge at the top of the screen is the Guard Gauge.
When you block the opponent's attack, it decreases by the Guard Crush value set for each ability.
When it nears 0, the character will glow red when blocking.
When it reaches 0, they become Guard Crushed and are left completely open to attack.
It refills automatically over time.
-
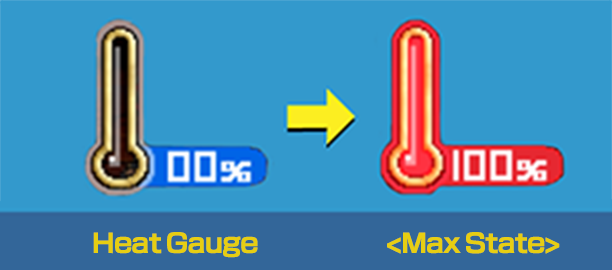
![Heat Gauge [Lud Only]](../../share/images/how-to-play/g_sys_img7_title-en.png)
Lud's special gauge.
It maxes out at 100%.
When Lud catches an attack using his special moves Super Iron Arm Guard and Super Diamond Guard, it fills according to the opponent's strength.
By using a portion of it, you can unleash a stronger version of each respective special move.
The gauge cost is set for each move. -
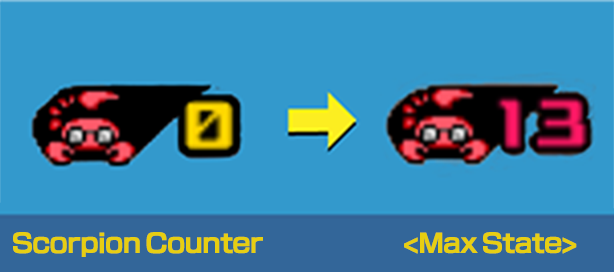
![Scorpion Counter [Boyd Only]](../../share/images/how-to-play/g_sys_img8_title-en.png)
Boyd's special counter.
It maxes out at 13 hits.
It accumulates whenever you hit the opponent with the special moves Sunny Finger, Sunny Finger (Down), and Twin Sunny Finger.
When Super Shiny Punch hits, its power increases according to the number on the Scorpion Counter.
When you hit with Super Shiny Punch, the counter resets to 0.

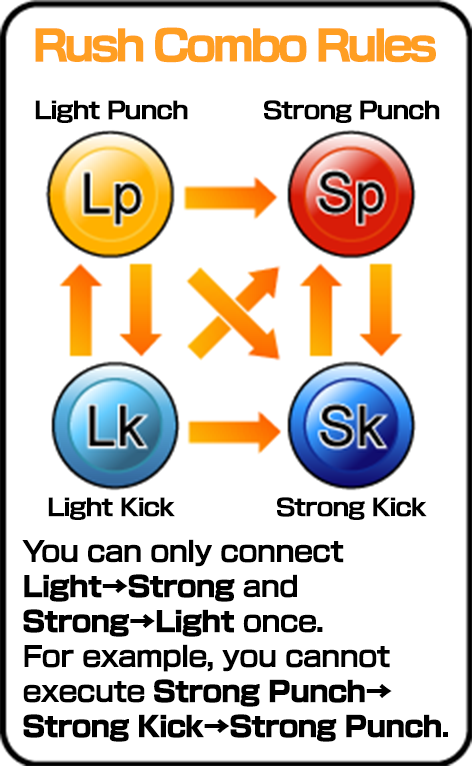
You can cancel a normal move's post-animation (the opening after attacking) and use another normal move.
By doing this, you can press the attack buttons with the right timing to chain your attacks together (combo).
Rush Combos follow certain routes. You will only cancel an attack's post-animation when you press the buttons following the right order.
Furthermore, Rush Combos will only work when they hit or are blocked. Attacks that don't hit won't have their post-animation canceled.
They can also be executed in the air. This makes aerial combos possible.
Note: Orville and Bazoo follow their own special routes. Rush Combos are not possible while in Mito's Crime Stance.
The cancel works with a fairly wide window, so you can use combos with some delay to make their timing harder to predict!
Light Attacks have a short post-animation as it is. The trick is to input the following attack a little ahead of time.
For example, the timing of a Light→Light→Strong→Strong combo is tap, tap, TAP, TAP!